Axonometric explosion drawings are one of the best and visually most striking ways to present your design ideas. They showcase all the information that a plan, section, elevation and a 3D image would convey, but showcase them all in one image! However, due to the aforementioned fact, they also tend to require quite a lot of time and effort.
As we tend to do at Archibite, we like to keep things simple and flexible. If we create these axonometric drawings by using a standard path such as Revit -> Sketchup -> Illustrator -> Photoshop, we utilize too many programs and lack flexibility for future changes in our designs. Instead, let’s use Revit’s built in axonometry tools, fine-tune our image visually within Revit and add Archibite entourage to liven up the image within Revit as well. The end result will be a beautiful axonometric image that adapts to changes in the model and can be adjusted incredibly fast.
Step 1: Create the axonometric view
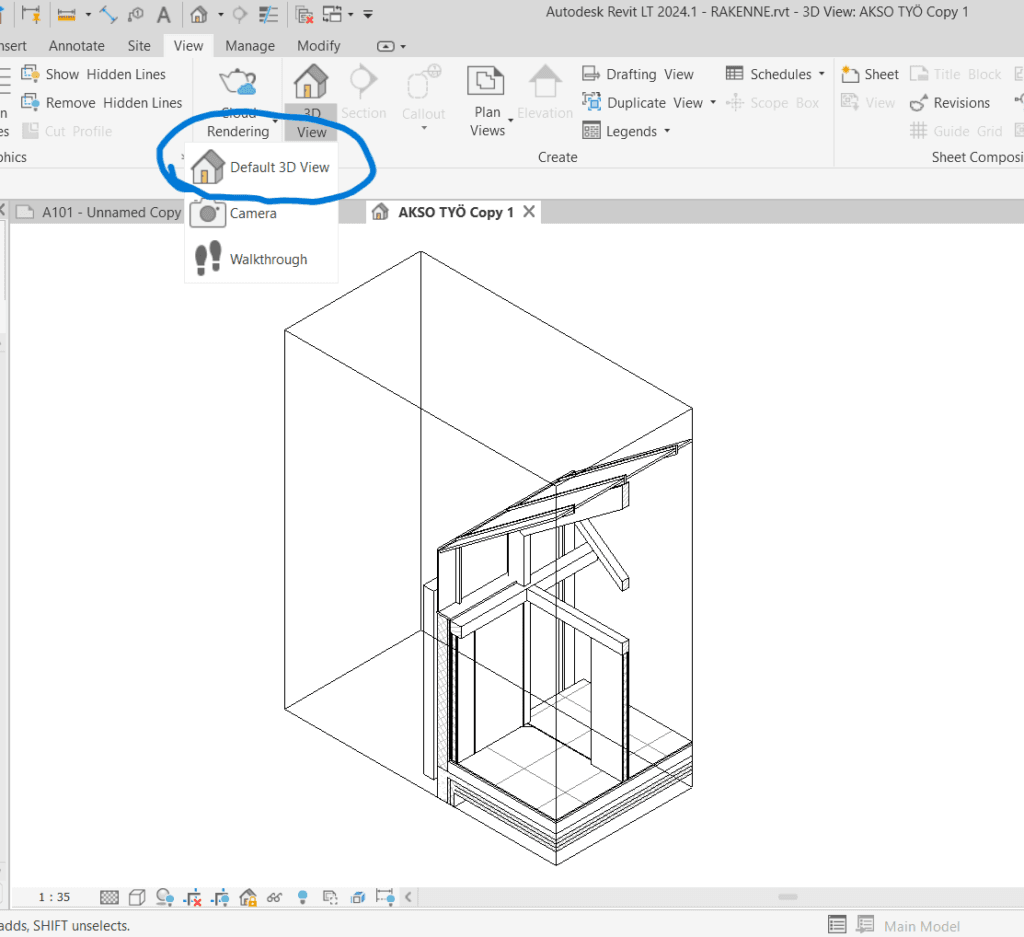
First we’ll make our 3D axonometric image using the regular 3D view and cut it using the section box to the appropriate size.
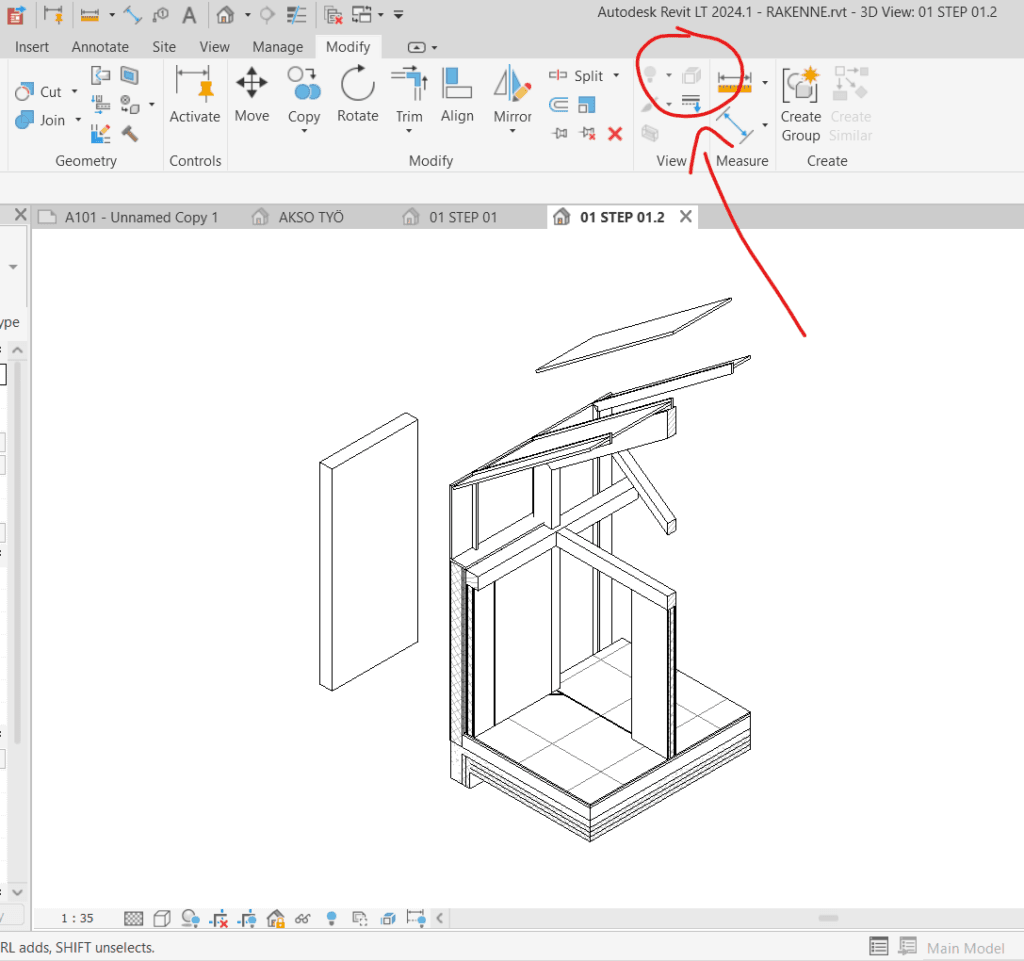
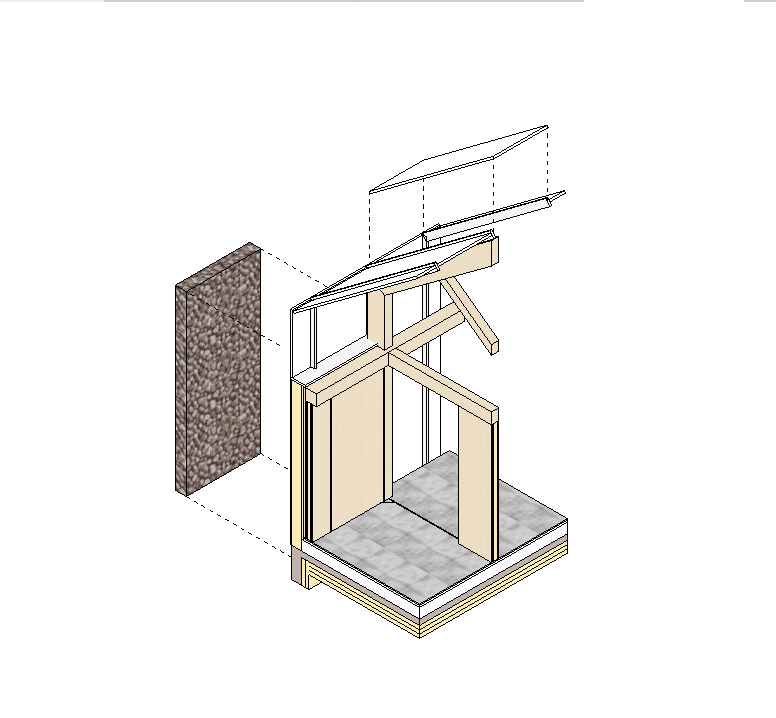
Let’s hide the section box and explode the necessary parts of the image using the Displace Elements tool:
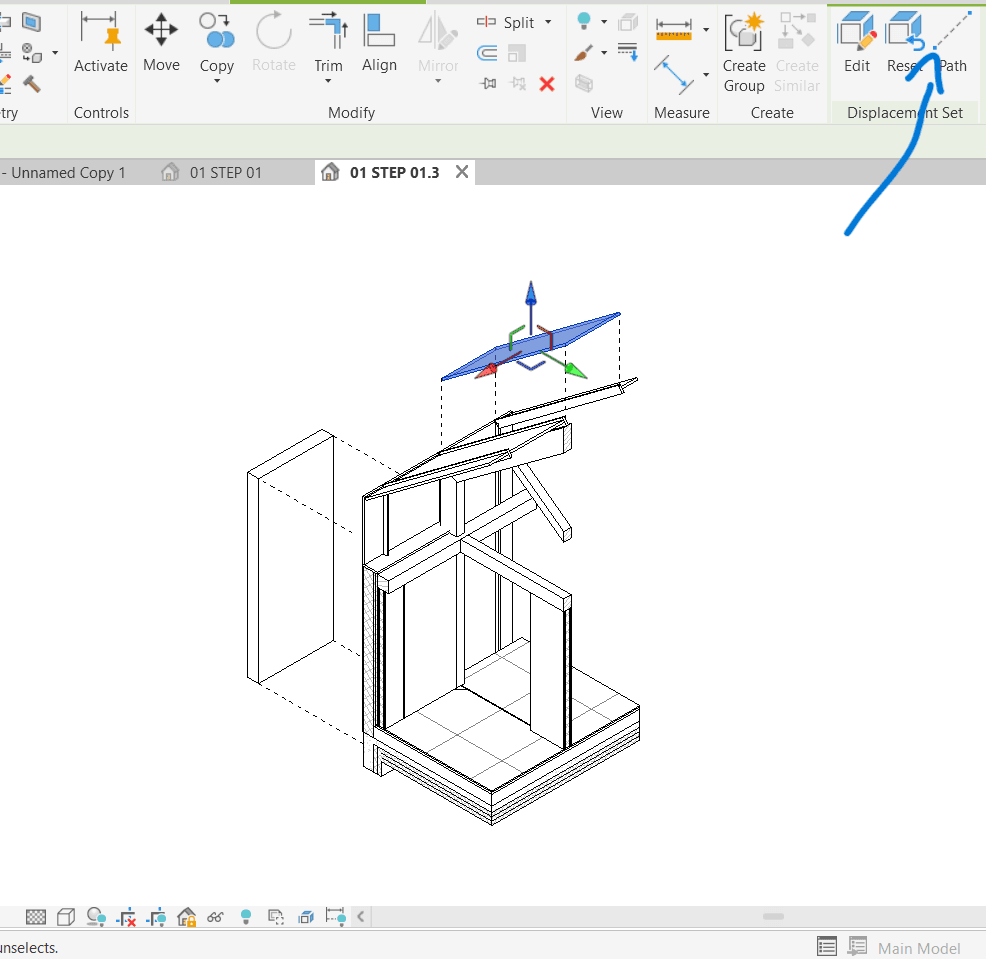
Let’s add the explosion lines to showcase the original locations of the components with the Displace Elements tools built-in Paths tools:
Step 2: Visual fine-tuning
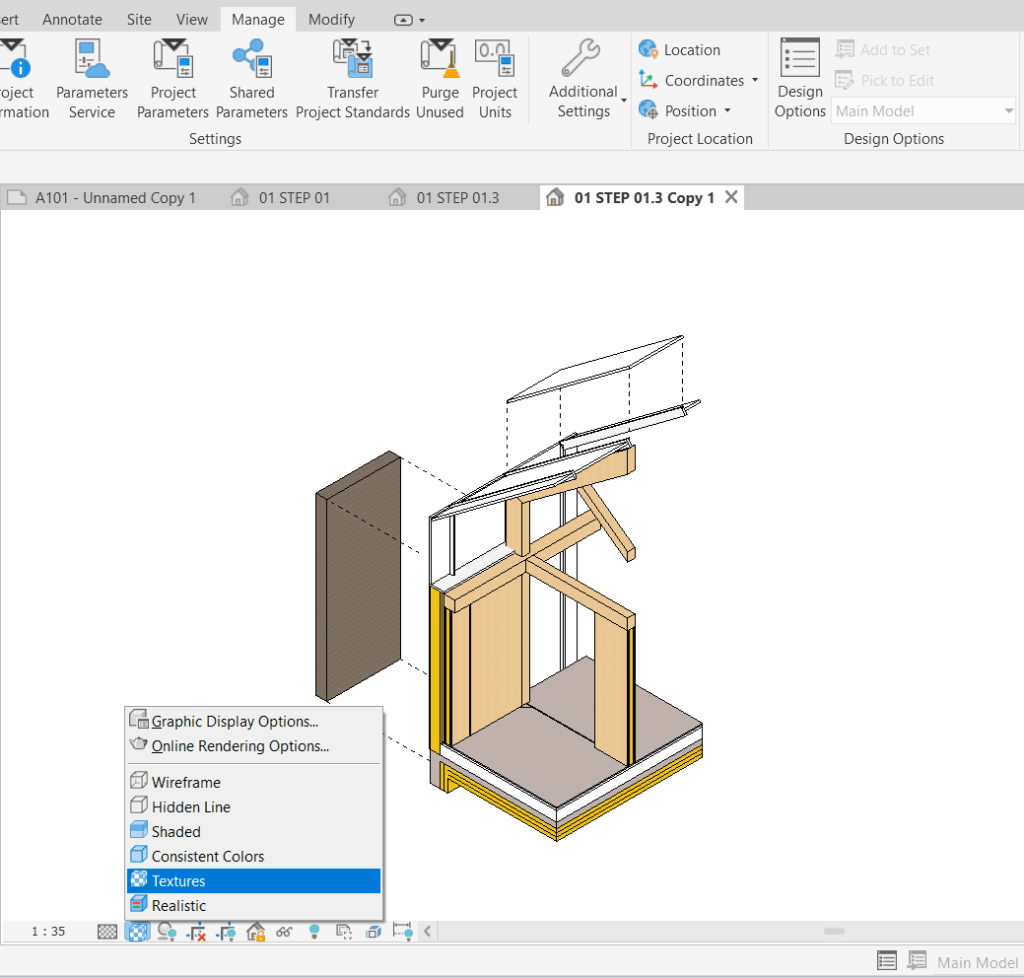
Now let’s make the image pop with some fine-tuning. Let’s first set the Revit Visual Style to “Texture”:
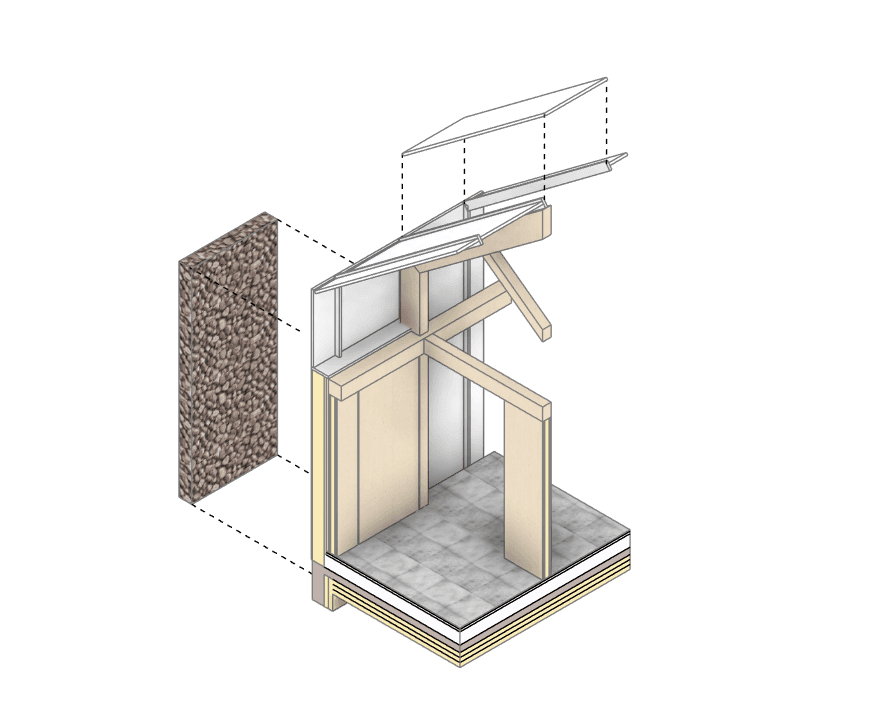
Let’s adjust the materials from the material browser:
Now let’s add some shadows and realistic textures for the wood, the stone facade and the concrete tile flooring (psst… you can find Archibite textures by clicking here):
Step 3: Revit Entourage
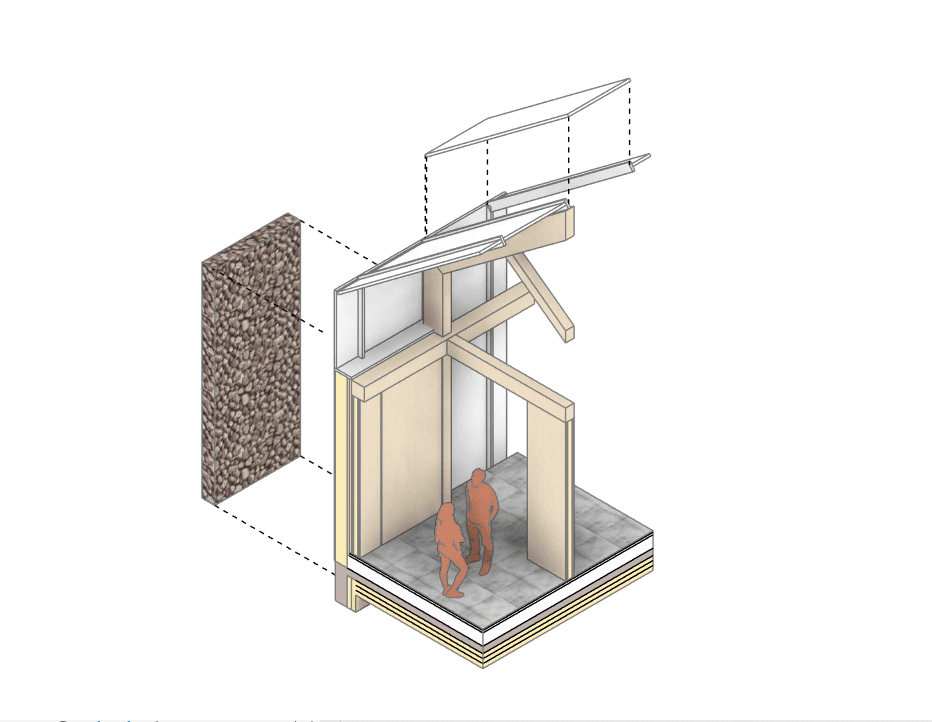
Let’s liven up the image and add all the entourage within Revit. We are using easy to use Archibite products that you can all find from our shop:
To hide these 3D entourage- objects from other views where they might just be an issue, we can utilize view templates or as a less common workaround, worksets!
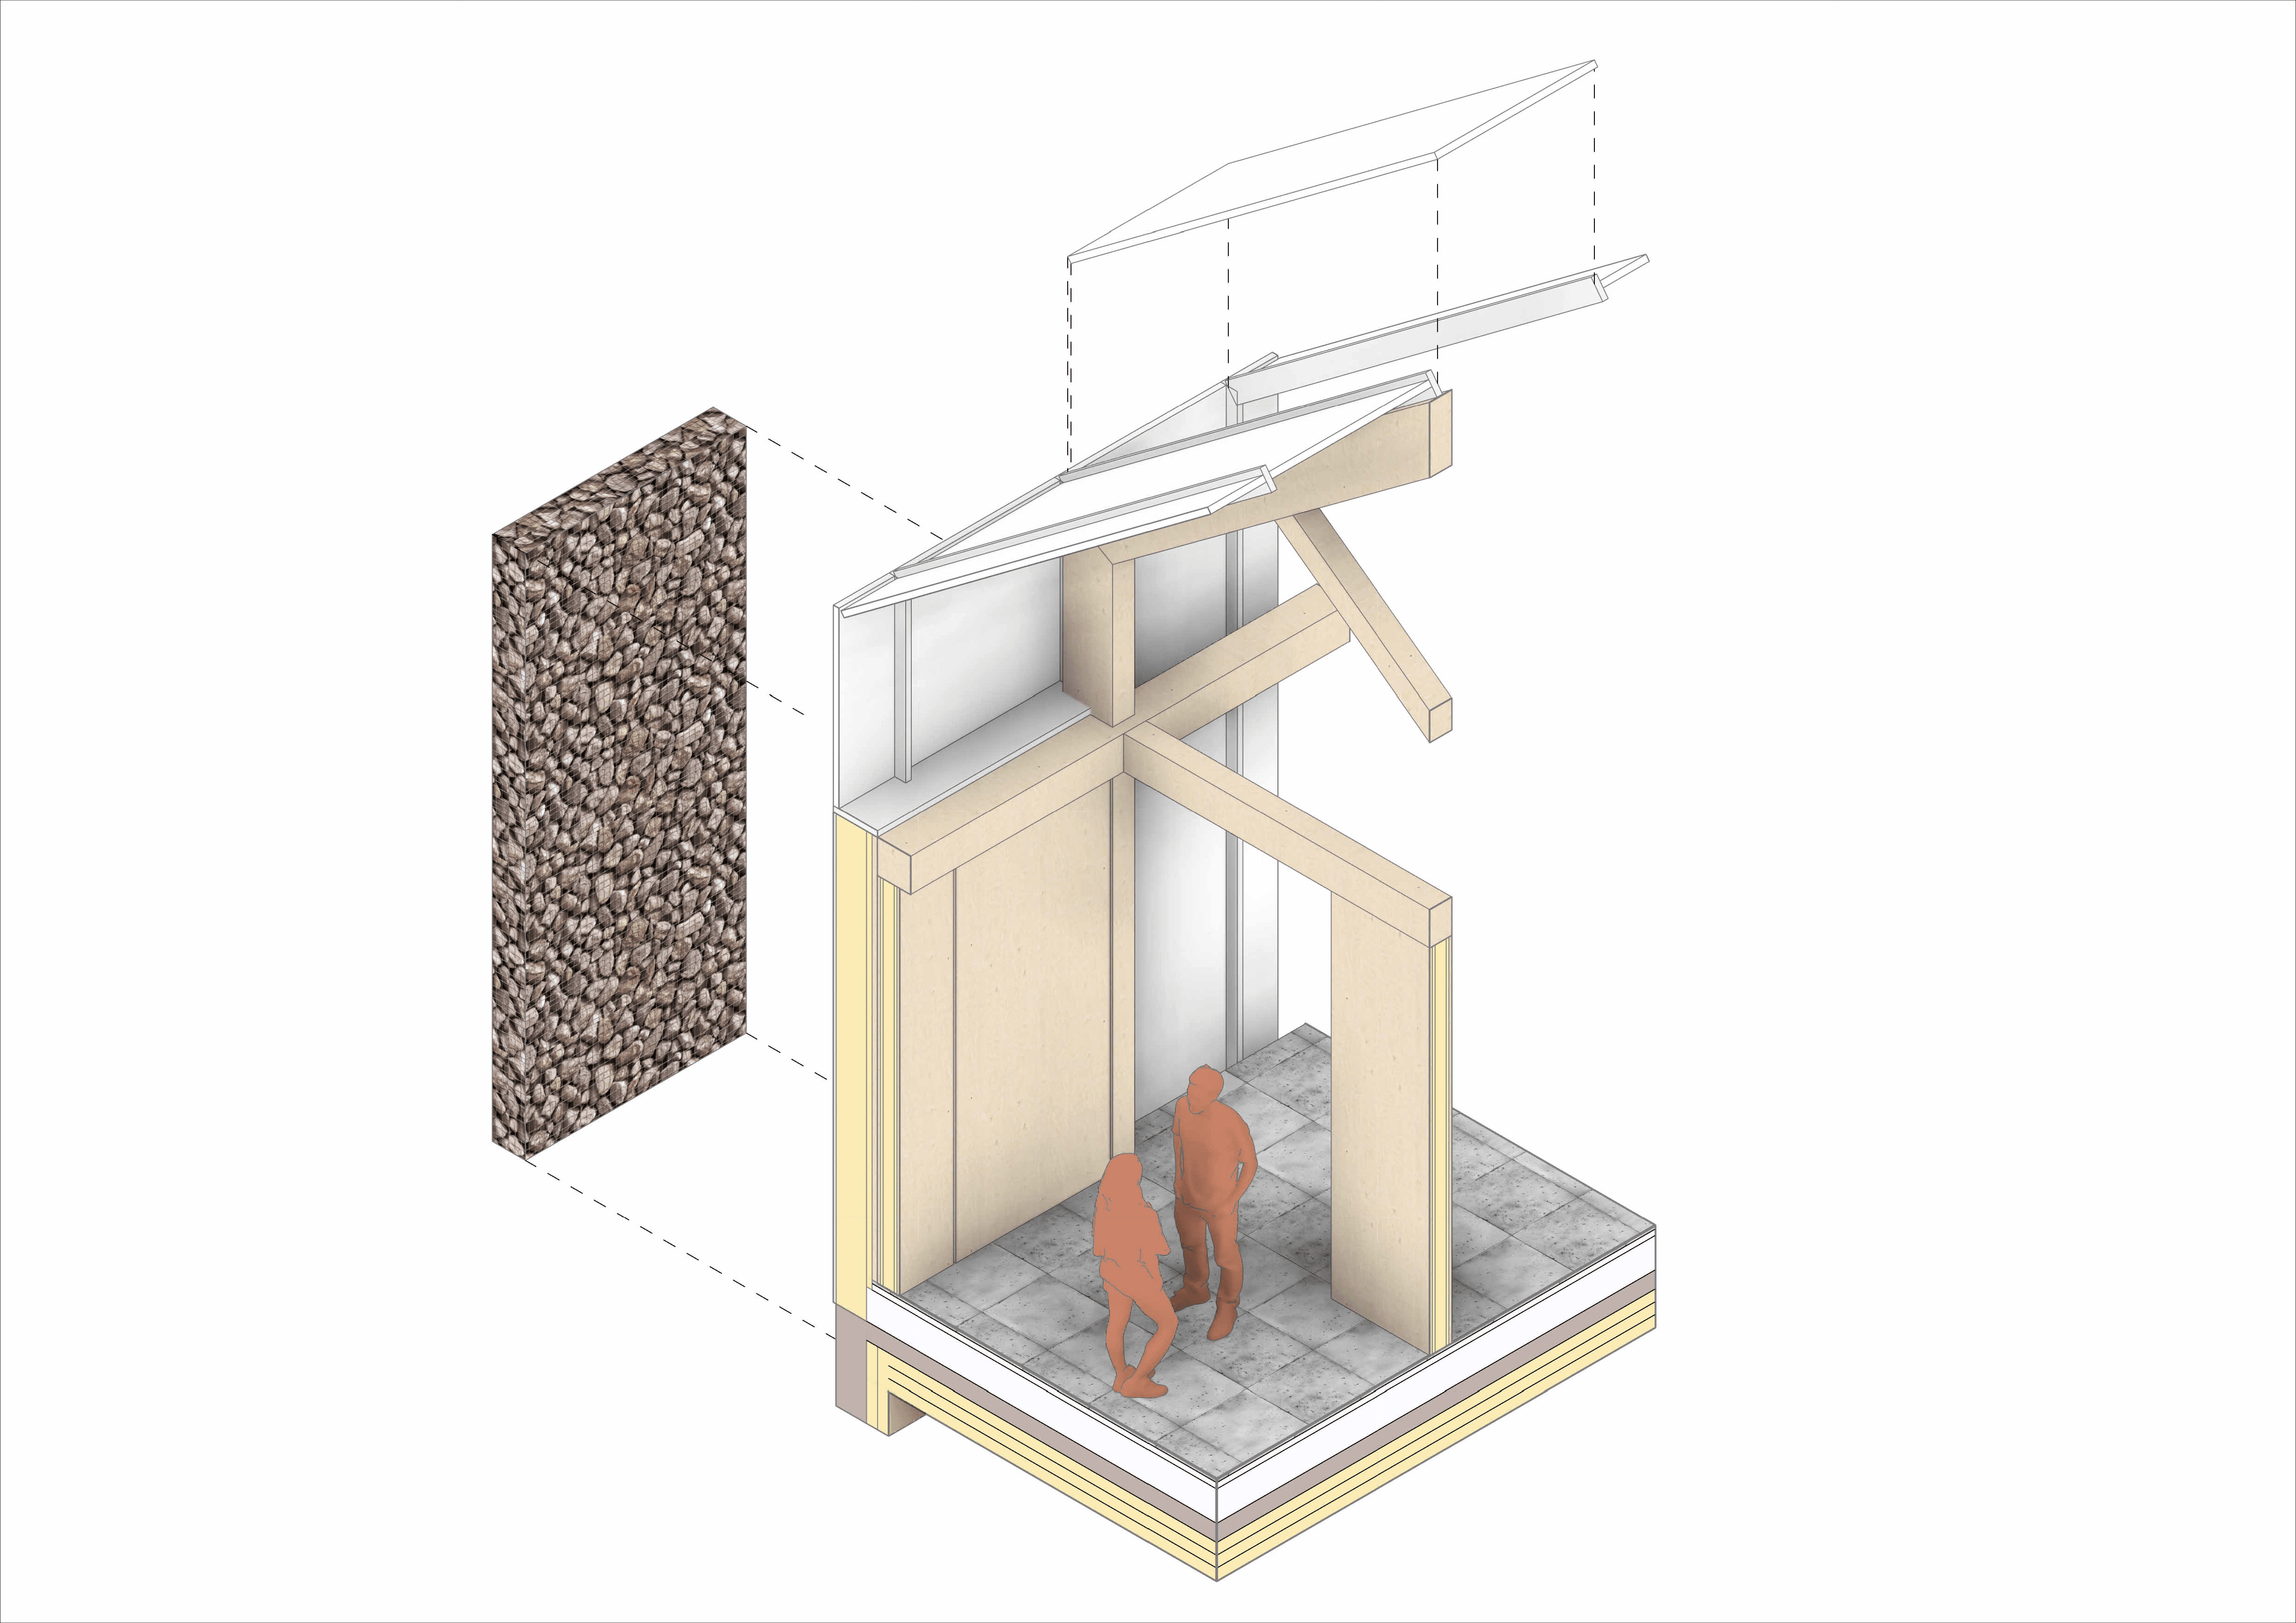
Final Product
Here it is exported from Revit! We can get a nice looking and fully editable 3D axonometric image all within one program. We can of course touch it up even more with Photoshop and add some colour filters and touch-ups if needed. For this, Archibite has excellent and easy to use Photoshop brushes and vector cut-out images that you can use to liven up your images even further.

If you need products such as Textures for Revit, Revit Detail Items or Revit models, head on over to our webstore and check out our hundreds of products to help you visualize those projects!
And be sure to subscribe to our newsletter to keep you posted on all our free products, tutorials and discounts! See you next time 🙂